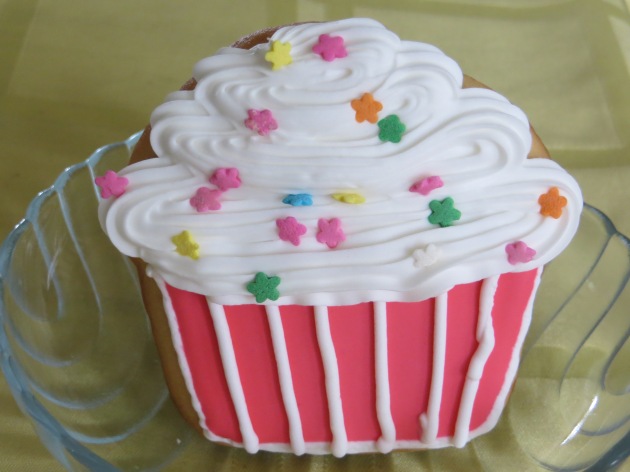
Cupcake Cookie with Sprinkles
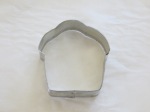
Cupcake Cookie Cutter
I had made some sugar cookie dough a few weeks ago and froze the dough because I didn’t get around to baking the cookies. I had a cupcake cookie cutter and thought it would be fun to decorate the cookies as cupcakes. For tips and tricks on baking and decorating cookies with royal icing, see my post on Baby Girl Cookies.
Cupcake sugar cookies?!
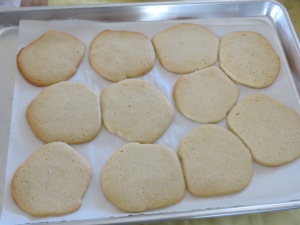
After I carefully rolled out the dough on parchment paper and cut the cupcake shapes out, I popped a tray into the oven. I was dismayed to see how much the cookies spread in the oven! 😦 They weren’t recognizable as cupcakes at all! Oh, well, I thought, it’s a good thing that I was not making these for a particular event! (After I finished decorating, you’ll see that the shape didn’t really make too much of a difference in this case. Still, I will used a different recipe next time I make shaped cookies!)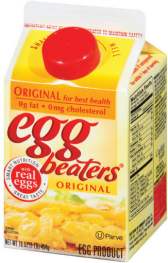
I continued on, making the royal icing while the cookies cooled. I made royal icing from pasteurized egg whites. You can buy the egg whites ready to use from the grocery store. I’ve like using egg whites better than meringue powder because my icing comes out softer. I don’t like really hard icing for cookies.
The advantages of buying the egg whites in the carton are 1) You don’t have to separate them from the eggs yourself, 2) They are shelf stable for some time so you can buy them ahead of time and they are ready to use when you want them, and 3) You don’t have to worry about salmonella because the egg whites are pasteurized.
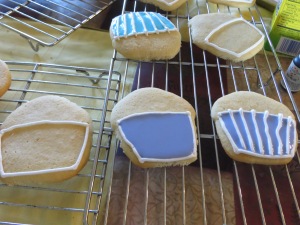
Three steps to decorate cupcake liners
I decorated the cupcake liner first, outlining the bottom of the cupcake with white icing, then flooding it with thinned colored icing. (I used more of the pasteurized egg whites to thin the royal icing for flooding.) The tip of a chopstick works well to spread the icing to the edges and into the corners.
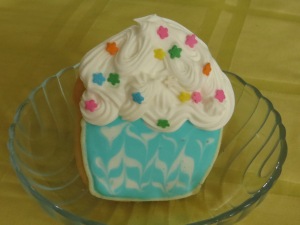
I decorated the liners in various ways. For some I piped white stripes to imitate the accordion fold of basic cupcake liners. When the lines were piped right away before the flood icing set, they sank into the flooded icing, giving a nice integrated look. For some, I dipped a chopstick tip into thinned icing of contrasting colors to make polka dots. For some, I drizzled lines of contrasting thinned icing and ran a toothpick through the icings to swirl them.
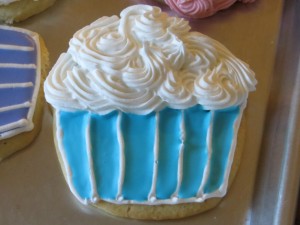
Piped Lines

Polka Dots
Swirled Pattern
The last step was to add the frosting tops. I used a variety of star tips to pipe luscious-looking mounds of frosting on the top of the cupcakes. When I ran low on frosting, I used a knife to spread the frosting to look like a homemade frosted cupcake. Colored sprinkles added a festive touch!
Cupcakes or Cookies? You decide!

Cupcake Cookies


 wanted to make something with a Chinese theme and saw these adorable mini-cupcakes on


